March 1, 2016
DIY : SHARPIE MARBLE NAILS
Looking for something different & fun to try with your nails? Sharpie marble nails are a fun and easy way to add a touch of personality to your manicure. In this post, we’ll guide you through the process, detailing the materials, tools, and step-by-step instructions.
What materials and tools do you need?
- Base Coat
- Any Color of Sharpie Markers
- Small Craft Brush
- Isopropyl Rubbing Alcohol (91% was used for this TuesTorial)
- Paper Towel
- Top Coat
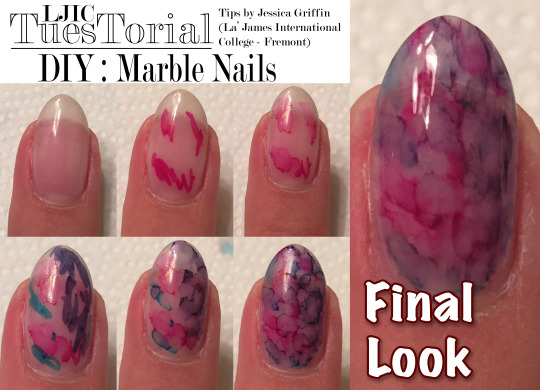
Step-by-step instructions on how to create the marble effect
Today’s tutorial comes from Jessica Griffin (Nail Technology program at La’ James International College). Check out this cute Marble technique using Sharpie Markers & rubbing alcohol.
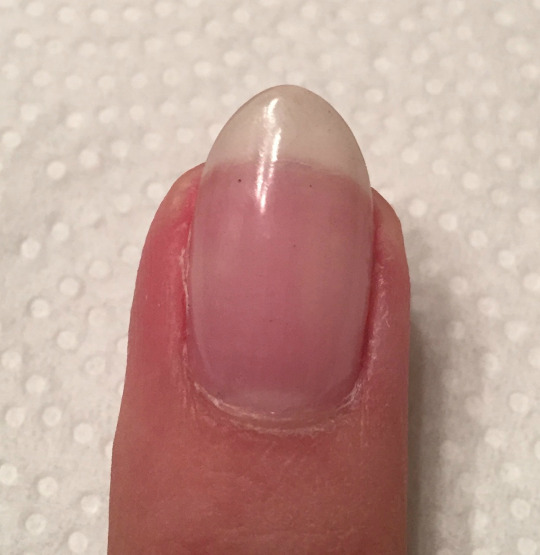
Step 1:
Apply Base Coat and let it dry completely.
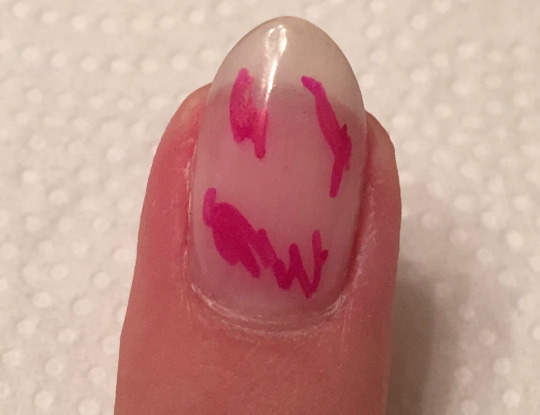
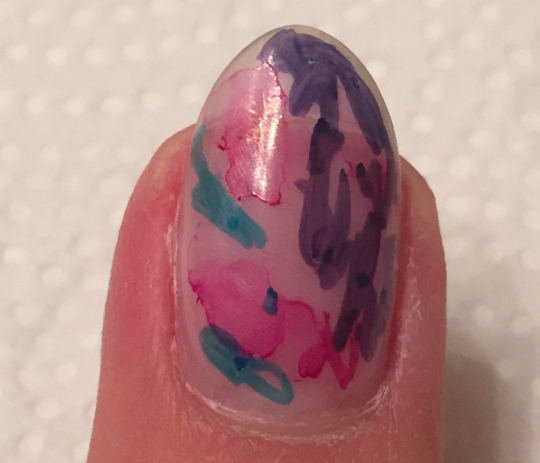
Step 2:
Using a Sharpie Marker (any Color), scribble some lines onto the nail.
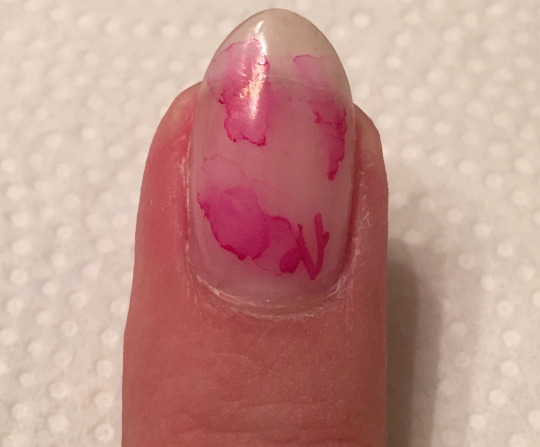
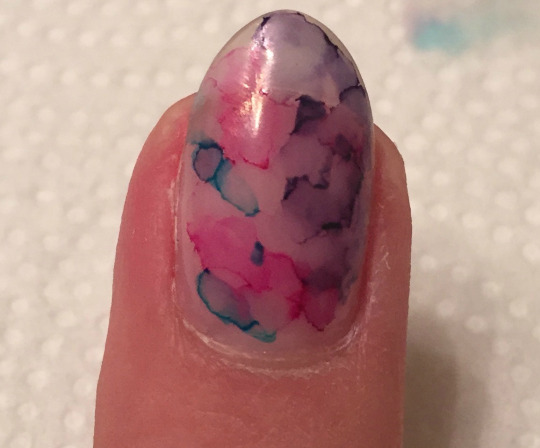
Step 3:
Place a small amount of Isopropyl Alcohol in a small bowl. Next take your small craft brush and dip it into the alcohol. Tap the brush bristles on a paper towel to get excess alcohol out. Then place/tap brush over the scribble lines and watch the color “bleed”.
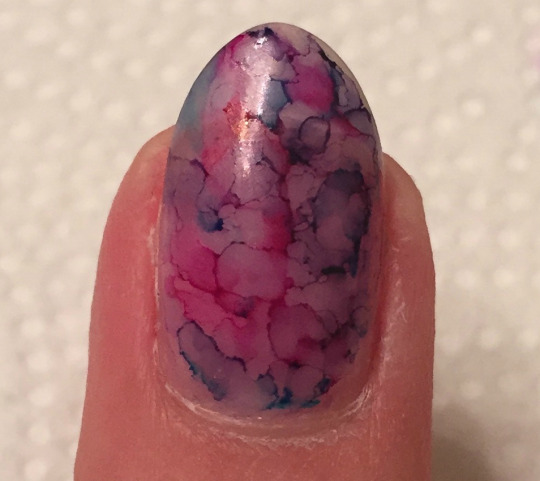
Step 4:
Add more colors if you choose.
Step 5:
Repeat step 3. (TIP: the more alcohol you have on your brush the more the color will “bleed”. The less alcohol you have on your brush the more concentrated the color will be. As you play around you will know how much you want for your desired look. You can always add more color.)
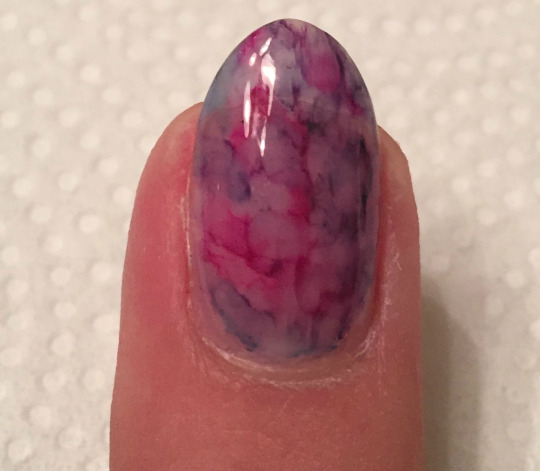
Step 6:
Jessica added more color and less alcohol to really get her colors to pop.
Step 7:
Once you have achieved your desired look, finish with a Top Coat and your done! (TIP: Design will easily come off with polish remover. Individuals with porous nails, generally due to previous nail damage may see a little staining.)
Thank you Jessica for sharing this great technique & for participating in today’s LJIC TuesTorial!
Tips and tricks for getting the best results
To ensure optimal results for your Sharpie nails, follow these tips:
- Use high-quality sharpies that have a good ink flow and coverage.
- Use a thin brush – it will help you to create more delicate details.
- Use a light touch – when applying the rubbing alcohol, use a light touch to avoid over-blending the sharpie ink.
- Clean up any mistakes immediately – simply wipe away the sharpie ink with a cotton ball dipped in rubbing alcohol.
- Apply a top coat which will protect the design from chipping.
Are you ready to learn more about La’ James International College and our nail tech school? Contact an #LJIC Career Planner today. Call 888.880.2108.
Leave a Reply