Published: October 30, 2017
Last updated: February 13, 2025
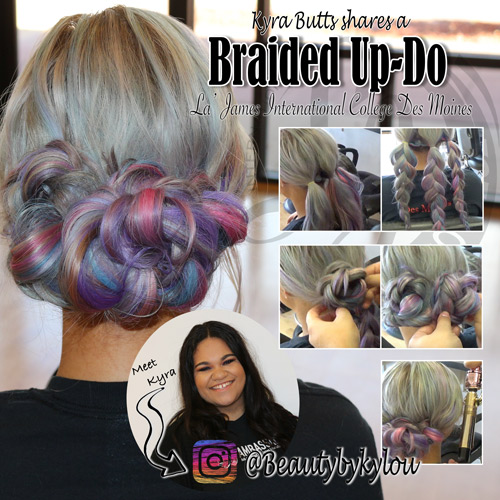
DIY: Braided Up-Do Tutorial
Have you ever dreamt of making a gorgeous up-do but felt intimidated by complicated styling techniques? Braided up-dos offer the perfect solution. This DIY tutorial will walk you through the steps of creating a stunning braided up-do, even if you’re a braiding beginner.
How to Achieve a Stunning Braided Up-Do
Kyra Butts, recent Cosmetology graduate from La’ James International College in Des Moines shares an easy Braided Up-Do! Check it out & try it out!! We love to showcase our students & graduates and this week…
What You’ll Need
Here’s a list of general essentials that you’ll likely need for most braided up-do hairstyles:
- Hair Brush
- Hair ties
- Bobby Pins
- Sectioning Clips (Optional)
Step-by-Step Guide
Here’s a detailed breakdown of the braiding and up-do creation process:
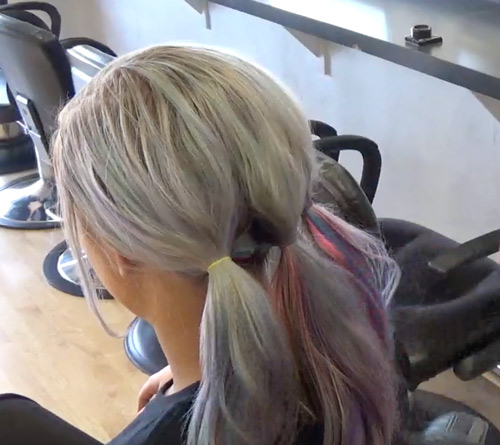
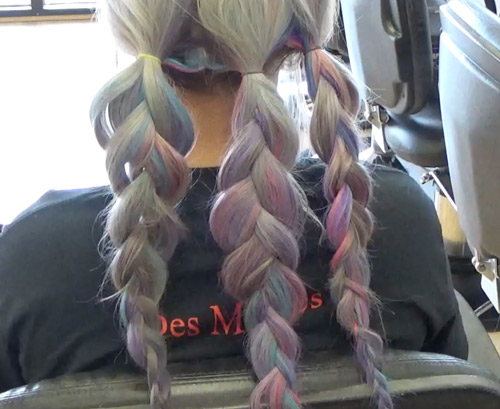
Step 1: Section the hair into 3 ponytails
Prep your hair with a brush and detangler (if needed). Decide on a parting and secure face-framing sections with clips. Divide the remaining hair into 3 equal sections and secure them with hair ties at your desired up-do height.
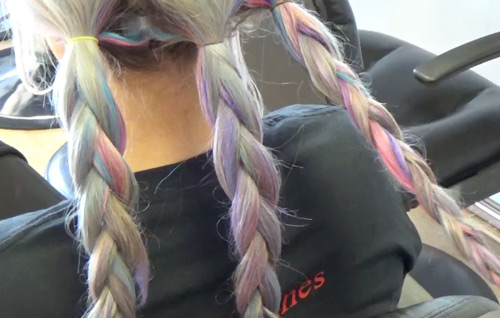
Step 2: Braid the 3 sections
Braid each ponytail using your chosen technique. Secure the ends with hair ties for a polished look.
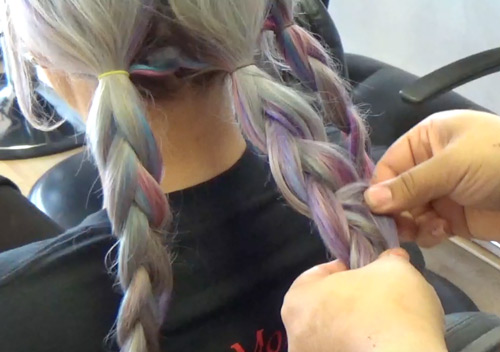
Step 3: Pull on the braids to give them a bigger & more full effect
Gently tug strands to loosen braids for volume. Tease the base of each braid for extra lift (optional for fine hair). Smooth flyaways for a textured, not stiff, finish.
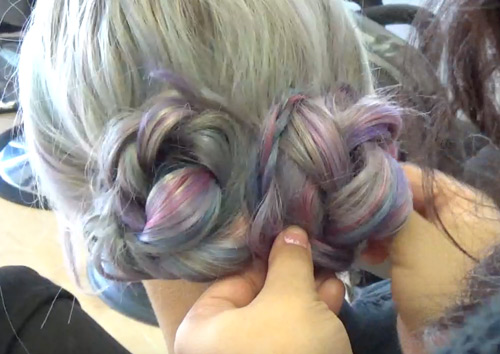
Step 4: Roll the braids into 3 buns and secure with bobby pins
Roll each braid inwards to create buns and secure with bobby pins. Use enough bobby pins for a firm hold, tucking them under the braids for a clean look. Experiment with positioning the buns closer together or further apart for a customized style.

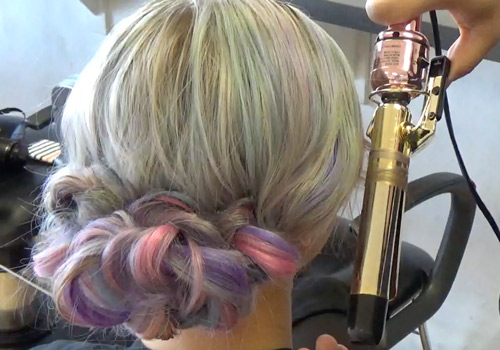
Step 5: Finish Touches
Curl the small pieces framing the face. Always curl away from the face to give a soft look. Finish with a hairspray to keep everything in place.
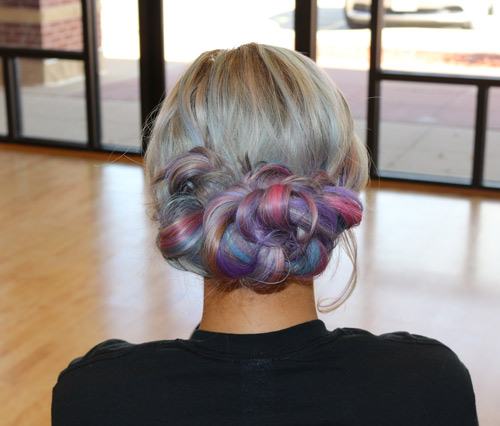
Check out the final look!! Great job Kyra!!
Watch the full video here
If you’d like to explore this tutorial in a video, we also prepared a video for you!
Braided Up-Do Tips & Tricks:
Now that you’ve mastered the basic steps of creating a braided up-do, let’s explore some helpful tips and tricks to elevate your style:
- Tame flyaways with a touch of hairspray.
- Accessorize with headbands, ribbons, or clips for a personal touch.
- Practice braiding different styles to improve your skills.
- Embrace a slightly looser style for a more natural look.
- Experiment with different braids or try incorporating multiple braids for a unique up-do.
Conclusion
With these simple steps and helpful tips, you’re now equipped to create a stunning braided up-do. Remember, braiding takes practice, so don’t be discouraged if your first try isn’t perfect.
Leave a Reply