Published: February 21, 2017
Last updated: August 23, 2024
How to Apply Nail Polish – Best Tips
It may sound simple but to some… applying nail polish can be a tedious & frightening task! Whether you want to do your own nails or improve your skills as a nail artist, use this guide to learn how to apply nail polish like a pro.
Nail polish application tips
This is one of the most important skills you can learn as a beautician. It’s also a great way to freshen up your style without spending a lot of time or money.
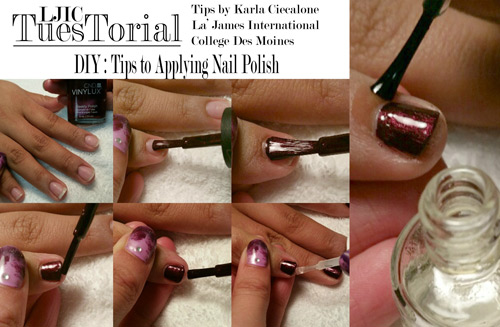
Karla Ciecalone, Nail Technology student at La’ James International College in Des Moines, shares some quick tips on how to apply nail polish:
Step 1: Preparing your nails
Wash your hands. Make certain your nail plates are clean of oil & other debris before you apply any product to your nails, otherwise the paint will sit on top of the dirt.
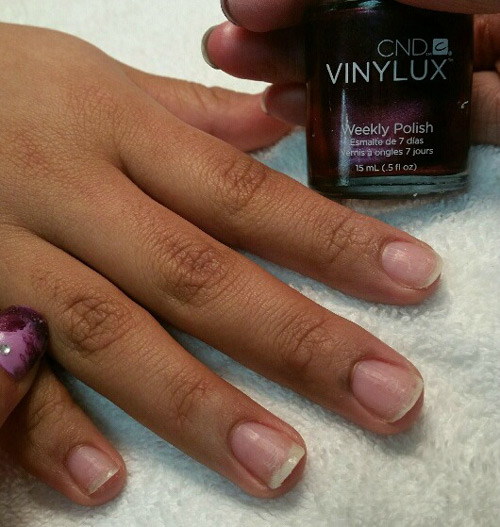
Step 2: Nail Polish Preparation
Now, it’ time to prep your nail polish.There are lots of different kinds of nail polish to choose from and every brand comes with its own list of directions, so be sure to read through any instructions before getting started.
Karla is using CND Vinylux Dark Lava for today’s Tutorial. This product does not require a thin base coat, but many leading nail polishes do, so be sure to apply a thin base coat if necessary.
To begin, simple shake the polish gently from side to side. After you remove the brush from the bottle, wipe the side of the brush away from you on the inside of the bottle to remove excess polish. You will have a bead of polish on the brush to cover the entire nail plate with one layer.
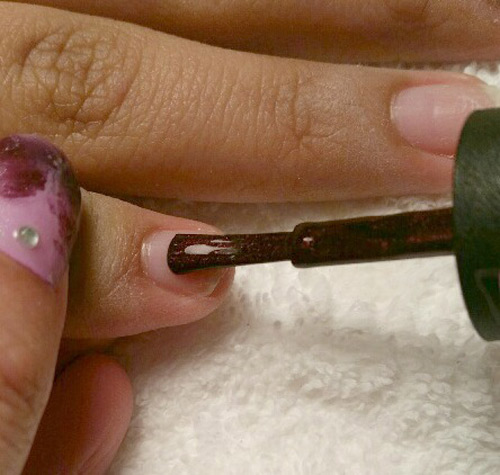
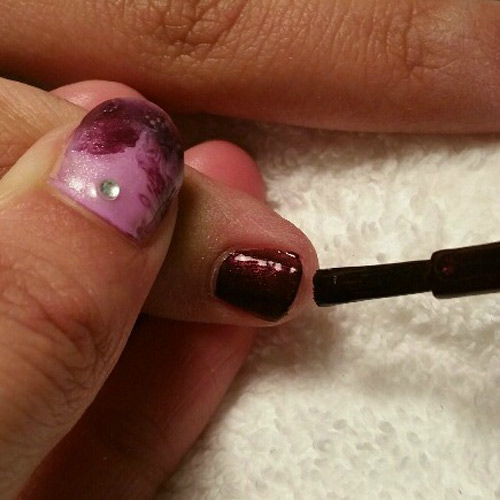
Step 3: Nail polish application
Holding the brush at a 30-35 degree angle, place the tip of the brush on the nail 1/8” away from the cuticle & in the center of the nail.
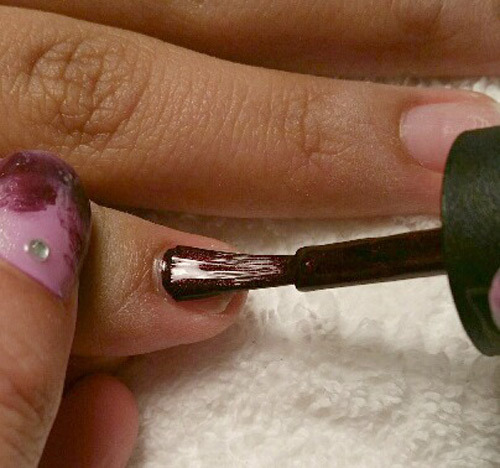
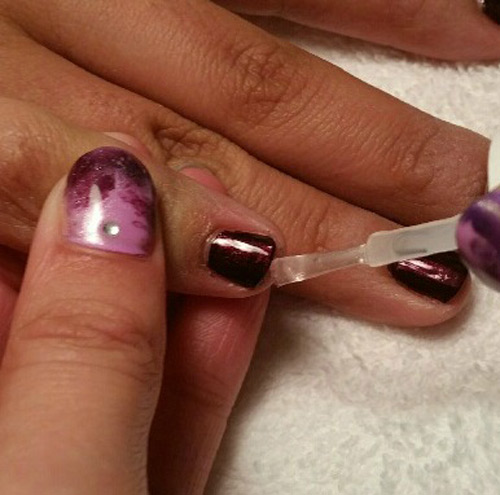
Step 4: Covering the entire nail
Lightly press the brush onto the nail plate creating a fan with the brush. Then push the brush towards the eponychium (cuticle) to produce a round edge of the polish. Pull the brush toward the free edge of the nail & down the center. Continue by moving to each side of the nail and pull in even strokes to the nail tip (free edge).

Step 5: Finalizing first layer of color
After finishing the first coat of each nail, move the brush back and forth on the very end of the free edge, barely touching it to apply color. This reduces chipping.
Step 6: Applying second layer
Move back to the first hand completed and apply the second coat of color. Applying a thin & even coating on the nail will give the color depth and perfect appearance. Wait until your nails dry before moving onto the next step. This usually takes around 15 minutes. You can also use quick drying nail polish to speed up the process.
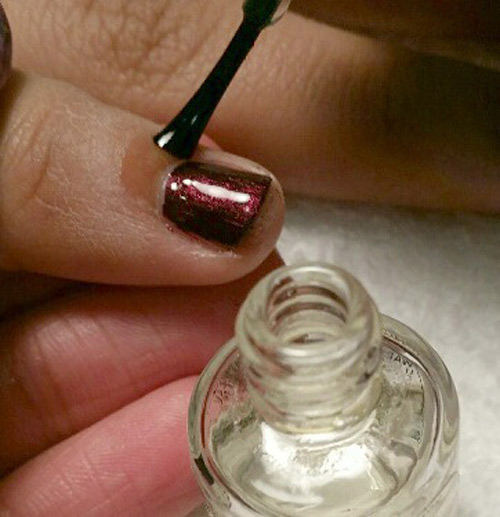
Step 7: Adding top coat
Apply Top Coat to prevent chipping and to give your nails a glossy finish. Make sure to coat the free edge of the nail with top coat as well. We also recommend using cuticle oil, which is made up of vegetable oils that contain vitamins and citric acid to help protect your nails.
Step 8: Taking care of skin around nails
Apply CND Solar Oil to the skin around the nails to moisturize. This prevents drying and cracking around the nails for healthier skin. If you need additional tips on using it, read our blog post on how to use CND solar oil.
Applying Nail Polish – Additional Tips
If you decide to change colors or go back to your normal nail color, use nail polish removers to safely remove the paint. Now that you know how to apply nail polish, continue practicing your skills until you feel comfortable doing it professionally. You can also try P.E.P. before you polish your nails, for more lasting manicure effects.
Thank you Karla for the great tips & for participating in today’s #LjicTuesTorial!
Starting Your Nail Tech Career
Curious to start your own career in nail technology? Contact a Career Planner to learn more about La’ James International College & our upcoming nail tech school.
Leave a Reply